
TL;DR:
- Proper signage installation enhances professionalism, safety, and compliance for UK businesses.
- Careful planning and correct fixing methods prevent costly rework and damage.
- Regular post-installation maintenance preserves signage quality and longevity.
Poor signage installation is one of the most overlooked causes of lost revenue, confused visitors, and compliance failures for UK businesses. A misaligned fascia sign, an obscured directional board, or a poorly fixed outdoor panel can all undermine the professional image you have worked hard to build. Whether you manage a retail unit, a corporate office, or a construction site, getting your signage installation right from the start saves money, protects your brand, and keeps people safe. This guide walks you through every stage of the process, from initial planning to long-term maintenance, so you can approach your next signage project with confidence.
Table of Contents
- Why effective signage matters for your business
- Preparing for installation: planning and requirements
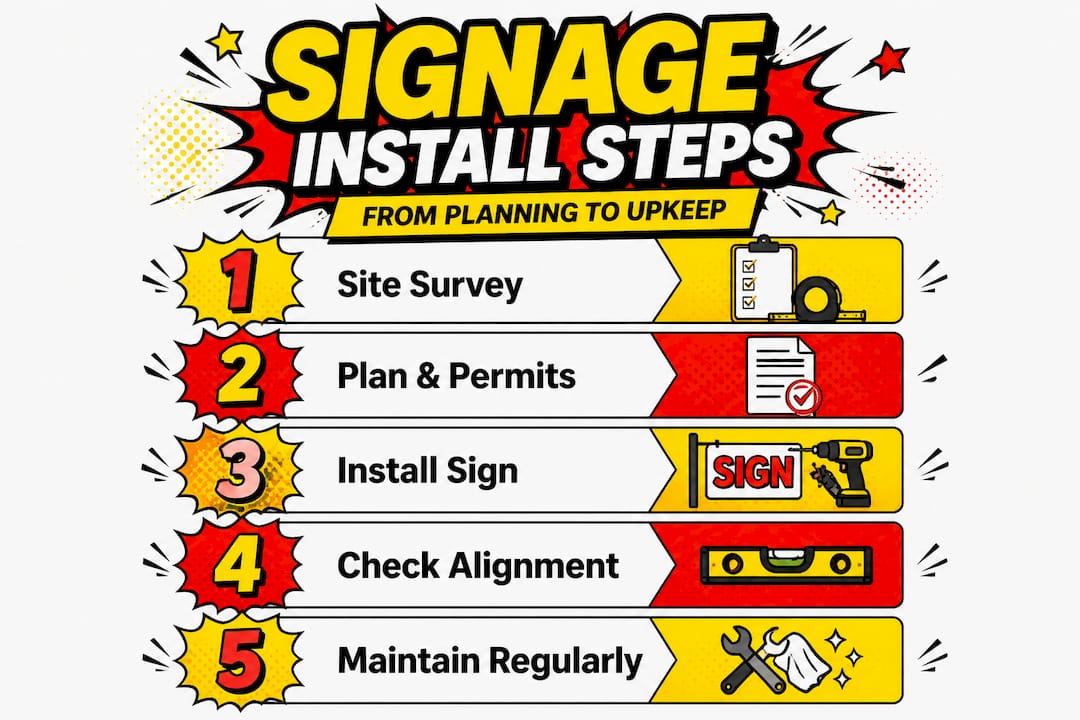
- Step-by-step site signage installation process
- Avoiding common signage installation pitfalls
- Post-installation checks and ongoing maintenance
- Why cutting corners in signage installation costs more in the long run
- Ready to elevate your site signage?
- Frequently asked questions
Key Takeaways
| Point | Details |
|---|---|
| Plan before you install | A careful site assessment and clear planning prevent costly repositioning or compliance errors. |
| Follow a proven process | Step-by-step installation ensures secure, visible, and brand-consistent signage. |
| Check and maintain regularly | Inspections and routine cleaning keep signage effective, safe, and within legal guidelines. |
| Avoid shortcuts | Rushed jobs usually lead to higher long-term costs due to failures or rework. |
Why effective signage matters for your business
Before jumping into the practical steps, it helps to understand why getting your signage installation right really matters.
Signage is often the first point of contact between your business and a customer, visitor, or contractor. A well-positioned, clearly legible sign communicates professionalism instantly. A crooked, faded, or incorrectly placed sign does the opposite. The importance of branded signage extends well beyond aesthetics. It directly influences how customers navigate your space, how safe your environment is, and how your brand is perceived at every touchpoint.
Effective signage delivers measurable benefits across several areas:
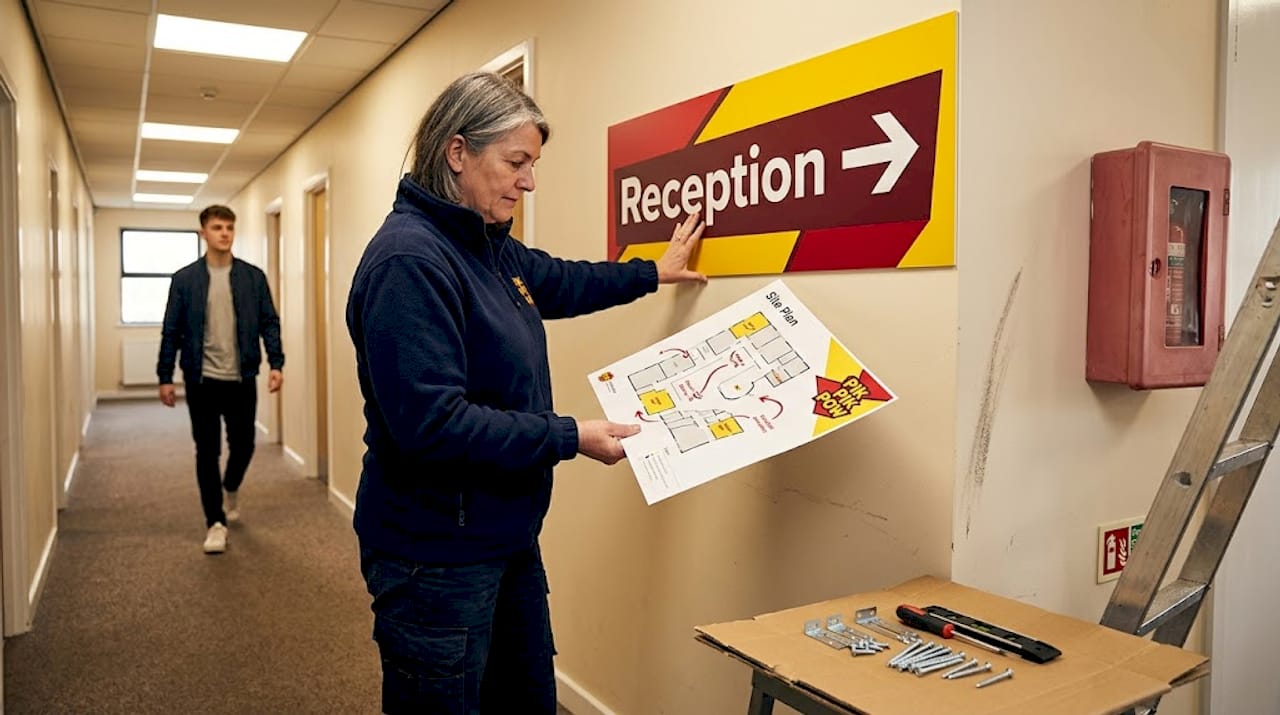
- Customer navigation: Clear directional signage reduces confusion and frustration, particularly in large retail or corporate spaces where visitors need to find specific areas quickly.
- Sales performance: Well-placed promotional and product signage at point of sale has been shown to increase purchase decisions, particularly for impulse buys.
- First impressions: Your shopfront or site entrance sets the tone for every interaction that follows. Quality signage signals that your business is credible and well-organised.
- Regulatory compliance: Safety signs, fire exit markers, and hazard warnings are not optional. They are legal requirements under UK health and safety legislation.
- Workplace safety: On construction sites and in industrial environments, correctly installed signage actively prevents accidents and protects workers and visitors.
“Businesses that invest in cohesive, professionally installed signage consistently report stronger brand recognition and improved customer satisfaction scores compared to those that treat signage as an afterthought.”
The financial case is equally strong. Replacing poorly installed signage, paying for re-installation, or facing compliance penalties all cost significantly more than getting the job done properly the first time.
Preparing for installation: planning and requirements
With the value clear, proper planning is the foundation of smooth signage installation.
Rushing into installation without adequate preparation is one of the most common reasons projects go wrong. A thorough site audit before anything is ordered or fixed will save you considerable time and expense later.
Conducting a site audit
Walk your site with fresh eyes. Consider the following:
- Where are the natural entry and exit points for visitors?
- What surfaces are available for mounting: brick, render, glass, timber, steel?
- What is the ambient lighting like, and will signs be visible at night?
- Are there any obstructions such as trees, pillars, or parked vehicles that could block sightlines?
- What height restrictions or access limitations exist?
Choosing the right signage type
Different environments call for different sign types. Directional signage guides people through a space. Safety signage warns of hazards and is legally mandated in many settings. Branding signage builds identity and recognition. Regulatory signage communicates rules and restrictions. Understanding which categories you need before you begin ensures your installation is both functional and compliant. Reviewing signage terminology explained early in the process helps you communicate clearly with suppliers and installers.
Legal compliance and permits
Health and safety compliance for site signage installation is non-negotiable. External signage visible from a public road typically requires planning permission or must meet specific permitted development criteria set by your local council. Internal safety signage must comply with the Health and Safety (Safety Signs and Signals) Regulations 1996. Always confirm your requirements before ordering.
Tools and materials checklist
| Item | Purpose |
|---|---|
| Spirit level | Ensures accurate horizontal and vertical alignment |
| Drill and appropriate bits | Creates fixing holes in various surface types |
| Wall plugs and screws | Secure fixings matched to wall type |
| Tape measure | Accurate positioning and spacing |
| Pencil or chalk marker | Marking positions before drilling |
| Safety goggles and gloves | Personal protective equipment during installation |
| Sealant (outdoor use) | Weatherproofing around fixings and edges |
| Ladder or access platform | Safe working at height |
Good signage positioning tips are also worth reviewing at this stage, particularly if you are working across a complex site with multiple sign locations.
Pro Tip: Involve key members of staff or relevant stakeholders in the planning stage. They often know the routes visitors take and the areas where confusion regularly occurs. Getting their input early prevents costly repositioning once signs are fixed in place.
Step-by-step site signage installation process
With preparation complete, it’s time to tackle installation itself, step by step.
Best practices for installing signage at diverse sites consistently point to a structured, methodical approach as the key difference between a successful installation and one that needs to be redone.
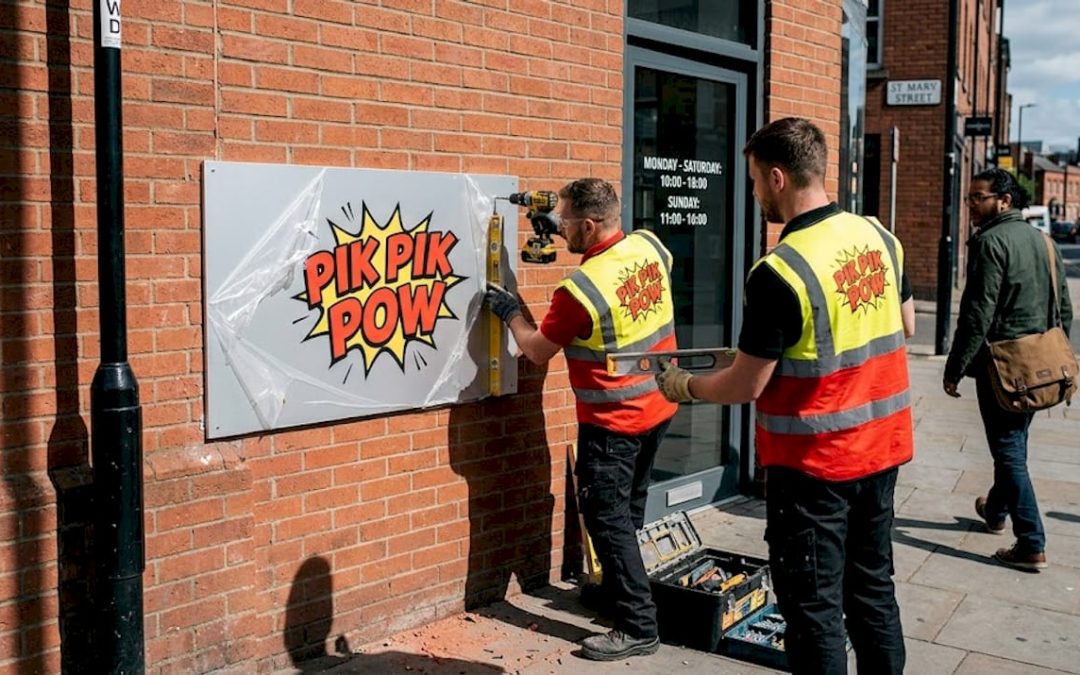
Confirm final sign specifications. Before you pick up a drill, verify that every sign matches the approved design, dimensions, and materials. Check that colours are correct and that text is legible at the intended viewing distance. Review designing signage for impact if you are unsure about legibility standards.
Mark positions accurately. Use a tape measure and pencil to mark the exact position of each sign on the surface. Double-check measurements against your site plan. Use a spirit level to confirm horizontal and vertical alignment before marking drill points.
Prepare the surface. Clean the mounting surface to remove dust, grease, or loose material. For outdoor installations, ensure the surface is dry. Check for hidden cables or pipes before drilling using a cable detector.
Drill and fix. Use the correct drill bit for your surface type. Insert appropriate wall plugs and fix brackets or direct fixings securely. Do not overtighten fixings on composite or acrylic signs, as this can cause cracking.
Mount the sign. Attach the sign to its fixings carefully, ensuring it sits flush against the surface. For larger or heavier signs, use two people to avoid damage during mounting.
Conduct a safety check. Test that all fixings are secure. Check for any sharp edges or protrusions that could cause injury. Ensure the sign does not obstruct walkways, fire exits, or sightlines.
Clean up. Remove all dust, debris, and protective film from the sign face. Dispose of waste materials safely. Document the completed installation with photographs.
Indoor vs outdoor installation: key differences
| Factor | Indoor signage | Outdoor signage |
|---|---|---|
| Materials | Standard acrylics, foam board, vinyl | Weatherproof aluminium, ACM, treated timber |
| Fixings | Lightweight screws, adhesive pads | Heavy-duty fixings, stainless steel screws |
| Weatherproofing | Not required | Sealant around fixings and edges essential |
| Lighting | Relies on interior lighting | May require illumination or reflective materials |
| Maintenance frequency | Annual checks | Seasonal checks recommended |
The school signage process is a useful reference for understanding how installation requirements vary across different building types and user groups.
“Never assume a fixing method that worked on one surface will work on another. Brick, rendered block, glass, and steel all require different anchoring approaches, and using the wrong method is a leading cause of sign failure.”
Pro Tip: Always use a spirit level and chalk line or laser marker when positioning multiple signs in a sequence. Even a small degree of misalignment becomes very obvious once signs are viewed together along a corridor or shopfront.
Avoiding common signage installation pitfalls
Even with careful work, common pitfalls can catch you out. Here is how to avoid them.
Many of the most expensive signage problems are entirely preventable. Understanding where installations typically go wrong allows you to take simple precautions that protect your investment and your reputation.
The most frequent mistakes include:
- Poor placement: Signs positioned too high, too low, or behind obstructions are effectively invisible. Always test sightlines from the perspective of someone approaching the sign for the first time.
- Wrong fixings for the wall type: Using standard wall plugs in a cavity wall or plasterboard partition is a common cause of sign failure. Always identify the wall construction before selecting fixings.
- Weak or insufficient mounting: Under-specifying fixings for heavy or large-format signs is a safety risk. Large signs in high-traffic or exposed locations must be mounted to withstand wind load and physical contact.
- Ignoring safety clearance requirements: Signs must not obstruct fire exits, emergency equipment, or safety-critical sightlines. Health and safety signage regulations are clear on this point, and non-compliance can result in enforcement action.
- Missing weatherproofing for external signs: Failing to seal around fixings and edges allows water ingress, which causes corrosion, delamination, and premature sign failure.
Major pitfalls in signage installation and how to counter them are well-documented across professional installation guidance. The consistent message is that shortcuts in preparation and fixing almost always result in higher costs down the line.
“A sign that falls from a wall, obscures an emergency exit, or fades within six months is not a cost-saving. It is a liability.”
Pro Tip: Document every stage of your installation with dated photographs. This creates a clear record for compliance purposes and makes it much easier to identify when and how any issues developed during later inspections.
Post-installation checks and ongoing maintenance
Once signage is up, your job is not quite finished. Verification and upkeep protect your investment.
A newly installed sign looks great on day one. Maintaining that standard over months and years requires a structured approach to inspection and maintenance. Scheduled checks and legal requirements post-installation are particularly important for safety-critical and external signage.
Immediate post-installation inspection. Walk the site and check every sign for correct alignment, secure fixings, and legibility. Confirm that no protective film or installation marks remain on the sign face. Verify that no signs obstruct walkways, exits, or other signage.
Document the installation. Record the location, dimensions, fixing method, and installation date for every sign. Photograph each sign from the intended viewing distance. Store this documentation securely for compliance and insurance purposes.
Schedule routine cleaning. Dust, pollution, and weather all degrade sign surfaces over time. Indoor signs should be wiped down regularly with appropriate cleaning products. Outdoor signs benefit from a thorough clean at least twice a year.
Conduct seasonal weather checks. After periods of high wind, heavy rain, or frost, inspect external fixings for movement or corrosion. Check seals around edges and fixings for any signs of water ingress.
Annual review. Carry out a full review of all signage annually. Look for fading, cracking, delamination, or damage. Assess whether sign positions remain appropriate as your site or business changes. Review types of site signage to confirm your current provision meets operational needs.
Pro Tip: Set recurring digital calendar reminders for each maintenance interval. It sounds simple, but scheduled reminders are the most reliable way to ensure inspections actually happen rather than being repeatedly deferred.
Why cutting corners in signage installation costs more in the long run
To wrap up the step-by-step process, here is an industry perspective worth considering.
We see it regularly. A business owner or site manager decides to save money by skipping the site audit, using a cheaper fixing method, or rushing the installation to meet a tight deadline. The signs go up quickly. They look acceptable at first glance. Then, within weeks or months, problems emerge. A sign shifts out of alignment. Fixings corrode. A panel falls from a wall. The cost of re-installation, plus any associated damage or compliance penalty, far exceeds what a methodical first installation would have cost.
The real issue is not the cost of the materials or the labour. It is the assumption that signage installation is simple enough to cut corners on. In reality, every stage of the process, from surface assessment to fixing selection to weatherproofing, requires deliberate decisions based on the specific conditions of your site.
There is also a brand dimension that is easy to underestimate. A damaged or poorly maintained sign communicates neglect. Customers and visitors notice. It creates doubt about the professionalism of the business behind it. Investing in quality materials, correct fixings, and trained installers is not a premium. It is the baseline for protecting the reputation you have built.
Designing for best practice from the outset, rather than retrofitting fixes later, is consistently the more cost-effective and professionally sound approach. The businesses that treat signage as a strategic asset rather than a box-ticking exercise are the ones that get lasting value from every installation.
Ready to elevate your site signage?
If you want signage that turns heads and ticks every box, professional systems and support are available.
At Pik Pik Pow!, we design, manufacture, and support the installation of bespoke signage for businesses across retail, construction, commercial interiors, and beyond. Whether you need a full suite of professional signage systems for a new site or tailored wayfinding signage options for a complex interior, our team brings the expertise to deliver results that last.
We combine precision manufacturing with strong design knowledge to ensure every sign we produce meets your brand standards, your compliance requirements, and your installation environment. From initial consultation through to post-installation support, we are here to make the process straightforward and the outcome exceptional. Explore our full range of site-ready signage solutions and get in touch to discuss your project today.
Frequently asked questions
Do I need planning permission for external site signage in the UK?
Yes, most external signage visible from a public road requires planning permission or must comply with specific local council guidelines under the Town and Country Planning (Control of Advertisements) Regulations. Always confirm with your local authority before installation, as outlined in the compliance guidance for site signage.
How can I ensure my signage is visible and legible to visitors?
Position signage at eye level where possible, use high-contrast colour combinations, and ensure lettering is large enough to read at the intended viewing distance. Following outdoor signage best practices for contrast and placement significantly improves legibility across all environments.
What’s the difference between indoor and outdoor signage installation?
Outdoor signage requires weather-resistant materials such as aluminium or ACM panels, stainless steel fixings, and sealant around all edges, while indoor signs are less exposed and can use lighter mounting methods and standard acrylic or foam board materials. The best practices guide covers the key distinctions in detail.
How often should site signage be maintained or inspected?
It is best practice to inspect and clean site signage at least annually, with additional checks after severe weather events and routine seasonal reviews for external installations. The post-installation compliance guidance sets out the recommended schedule for different sign types.
Can my business install signage without specialist help?
While basic interior signage can often be self-installed using the steps outlined in this guide, complex, large-format, illuminated, or safety-critical installations should always involve professional support to ensure compliance, structural integrity, and a quality finish.