

TL;DR:
- Clear signage guides new gym members effectively, reducing questions and enhancing safety during onboarding. Proper placement and design of signs improve independence, legal compliance, and brand perception, ultimately increasing member retention. Digital screens and ongoing maintenance further support a seamless, welcoming experience.
Good signage cuts the role of confusion out of gym onboarding entirely. When a new member walks through your doors for the first time, well-placed signs guide them to reception, explain what to do next, keep them safe, and reduce the number of questions your staff need to answer. The sign roles to prioritise are:
- Wayfinding and zone signs — entrance, reception, changing rooms, studios, exits
- Safety and mandatory signs — fire equipment, wet-floor warnings, equipment hazards
- Instructional signs — technique cues and QR links at equipment stations
- Motivational and etiquette signs — clean-down reminders, headphone guidance, positive framing
- Digital screens — class timetables, welcome messages, and onboarding content at reception and on the gym floor
UK compliance matters too. The Health and Safety (Safety Signs and Signals) Regulations 1996 set out when safety signs are legally required, and all signs need regular maintenance to stay effective.
Table of Contents
- Why does signage matter for gym onboarding?
- Which sign types should you use during onboarding?
- Where should you place signs across the member journey?
- What design and accessibility rules make onboarding signs effective?
- How can digital screens improve the onboarding experience?
- What do UK managers need to know about safety signage compliance?
- How do you measure whether onboarding signage is working?
- Your implementation checklist and supplier brief
- Key takeaways
- What gym managers often get wrong about onboarding signage
- Pikpikpow designs and installs gym signage from brief to fitting
- Useful sources for further reading
Why does signage matter for gym onboarding?
The practical answer is that signage does the orientation work your staff cannot do simultaneously for every new member. A first-time visitor who cannot find the changing rooms, does not know which machine to use first, or feels uncertain about gym etiquette is far more likely to leave and not return. Clear wayfinding removes that uncertainty before it becomes a problem.
The operational benefits stack up quickly:
- Fewer front-desk queries. When entrance signs, zone markers, and check-in instructions are clear, new members navigate independently. Staff can focus on genuine service rather than repeating directions.
- Shorter induction sessions. Instructional signs at equipment stations mean members arrive at their induction already oriented, so sessions cover technique rather than basics.
- Reduced liability. Mandatory safety signs for wet floors, heavy equipment, and emergency exits protect both members and the business.
- Stronger brand impression. Consistent design across signs signals professionalism and builds immediate trust with new members.
- Better retention. A member who feels confident and welcomed in the first two weeks is more likely to stay. Signage contributes to that confidence at every touchpoint.
Wall graphics and decals extend this further. Directional arrows, spacing reminders, and branded motivational graphics all reinforce the right behaviours without requiring staff involvement. That combination of orientation, safety, and brand reinforcement is what makes signage a genuine operational tool rather than a cosmetic one.
Which sign types should you use during onboarding?
The right mix of sign types depends on where a new member is in their first visit. Some signs are legally required; others are best practice. The table below covers the main categories, their purpose, and a practical example for each.
| Sign type | Primary purpose | Onboarding example |
|---|---|---|
| Wayfinding and zone signs | Direct members to key areas | Entrance arrow to reception; studio identifiers; changing-room labels |
| Safety and mandatory signs | Meet legal obligations; warn of hazards | Wet-floor signs; fire exit routes; equipment weight warnings |
| Instructional signs | Teach correct use of equipment | Step-by-step technique cards at cable stations; QR codes linking to video guides |
| Etiquette and behavioural signs | Reinforce expected conduct | “Please wipe down equipment after use”; “Headphones recommended in this zone” |
| Motivational and branding graphics | Build emotional connection and identity | Large-format wall graphics with brand colours and motivational copy |
| Digital screens | Deliver dynamic, time-sensitive content | Reception screen showing class timetable, welcome message, and PT promotions |
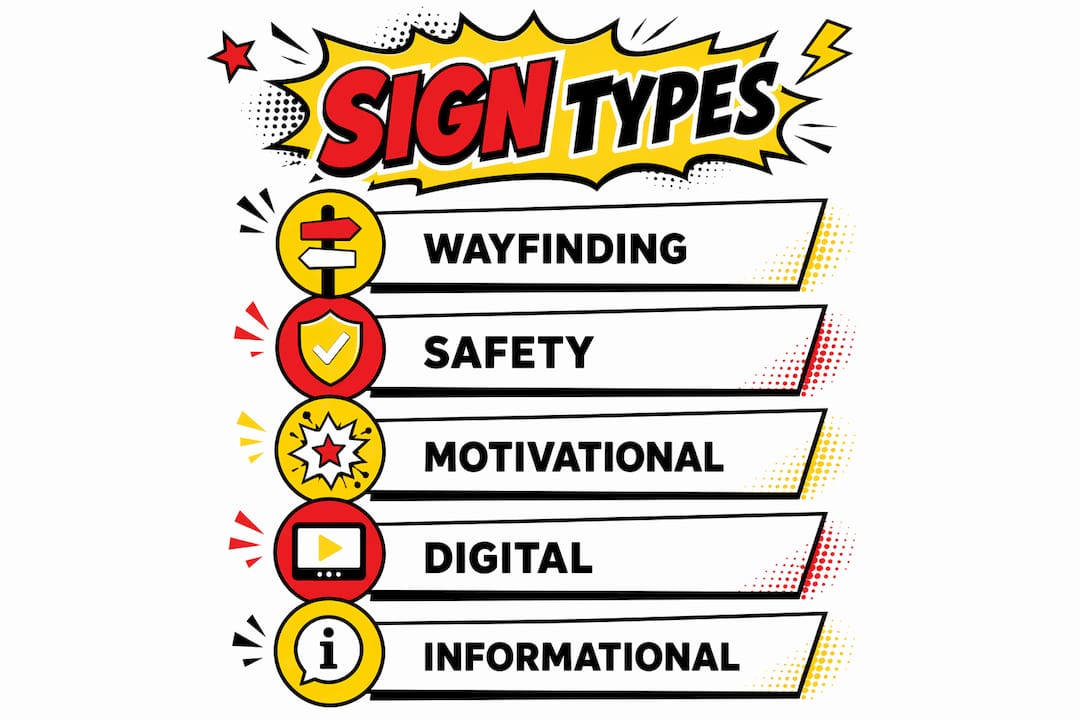
A few points worth noting. Safety signs are not optional when a risk assessment identifies a significant hazard that cannot be controlled by other means. BS 5499-4:2013 and BS 5499-10:2014 give specific guidance on sign size relative to viewing distance and illumination requirements. For instructional signs, keep copy short: a three-step technique cue works; a paragraph does not. Gym etiquette signs are most effective when they use positive framing (“Please return weights after use” rather than “Do not leave weights on the floor”).
For a full breakdown of sign types and recommended use-cases, the types of gym signage guide covers the complete UK picture.
Where should you place signs across the member journey?
Placement is where most gyms get signage wrong. Signs positioned too high, too small, or in the wrong sequence fail the member at exactly the moment they need guidance. Think of the onboarding journey as a series of decision points, and place a sign at each one.
Entrance and exterior. The first sign a new member sees sets the tone. A clear fascia sign or entrance graphic confirms they are in the right place. An exterior window graphic or A-board can carry a “New member? Start here” message pointing to reception.
Reception and check-in. This is the highest-traffic decision point. Place a welcome screen or printed panel showing check-in instructions, membership benefits, and the first three steps for a new member. A QR code linking to a digital induction video works well here.
Induction and consultation area. If you run a formal induction, a small “What happens next” sign or digital display near the induction desk removes anxiety. Short bullet points work better than paragraphs.
Gym floor and equipment zones. Zone identifiers (free weights, cardio, functional training) help members navigate independently. Cluster instructional signs at equipment stations rather than spreading them across walls. Spacing reminders and etiquette cues belong here too.
Studios and class zones. A screen or printed timetable outside each studio door tells new members what is on, when, and at what level. Instructor name and class description reduce the hesitation that stops new members from booking.
Changing rooms and corridors. Privacy graphics, locker instructions, and hygiene reminders serve a practical function. Corridors are also a good location for promotional nudges: a PT offer or class-pack promotion placed at eye level on the way out catches members when they are already in a positive mindset.
Exit points. A referral prompt, “Bring a friend” offer, or next-steps card near the exit turns a good first visit into a second booking. Keep it brief and benefit-led.
Pro Tip: Map your gym floor on paper and mark every decision point a new member faces. If there is no sign within two metres of that point, you have a gap in your onboarding signage.
For a detailed placement framework, the wayfinding signage guide for gyms covers zone-by-zone recommendations.
What design and accessibility rules make onboarding signs effective?
A sign that cannot be read quickly is not doing its job. These are the practical design rules that make the difference between signage that works and signage that gets ignored.

Hierarchy. Every sign needs a primary message, supporting copy, and an action prompt where relevant. The primary message should be readable at the intended viewing distance without the reader needing to move closer. Supporting copy adds context; the action prompt (a QR code, an arrow, a short instruction) tells the member what to do next.
Legibility. Sans-serif typefaces at sufficient size are the standard for wayfinding. HSE guidance requires that sign size is appropriate for the intended viewing distance. As a practical rule, a sign read from five metres needs a minimum character height of around 25mm; from ten metres, 50mm. High contrast between text and background is non-negotiable, particularly in low-light areas like corridors and changing rooms.
Tone and messaging. Welcome-first language works better than rule-first language during onboarding. “Welcome to the free weights zone” followed by a brief etiquette reminder lands more positively than a list of prohibitions. Short action verbs (“Scan here”, “Return weights”, “Ask at reception”) are clearer than passive constructions.
Accessibility. Use internationally recognised pictograms alongside text wherever possible. Plain English benefits all members, not just those with reading difficulties. Colour contrast should meet a minimum 4.5:1 ratio for body text to support members with visual impairments. Where a sign carries critical safety information, consider whether an audio alternative or staff-assisted option is needed.
Materials and finish. High-touch areas like reception desks and equipment stations need wipe-clean, anti-bacterial surfaces. Changing rooms require moisture-resistant substrates. For motivational wall graphics, a matt laminate finish reduces glare under gym lighting. For a practical overview of effective gym signage design, the design principles apply across all sign types.
How can digital screens improve the onboarding experience?
Digital signage gives gyms real-time flexibility that printed signs cannot match. Content can be updated instantly, scheduled by time of day, and tailored to the audience in front of the screen. For onboarding specifically, that agility is valuable.
Here is what to show, where, and when:
- Reception screens. A welcome message with the new member’s name (if your CRM supports it), the day’s class timetable, a QR code linking to the digital induction, and a brief “what to do first” sequence. This is the highest-impact screen in the building during onboarding.
- Gym-floor screens. Short motivational clips, equipment tips for the zone, and real-time class capacity notices. Keep clips under 30 seconds; members are moving, not watching.
- Studio and changing-room screens. Pre-class instructions outside studios reduce late arrivals. Changing-room screens can carry promotional nudges for PT, retail, and class packs without feeling intrusive.
- Content cadence. Schedule high-energy visuals and class promotions during typical peak hours. Informational and instructional content works better in quieter periods when members have more time to read. Time-limited offers (“Today only: 20% off PT sessions”) create urgency without permanent discounting.
- Measurement. Track QR-scan rates from reception screens, promo uptake from changing-room screens, and digital-screen impressions where your hardware supports it. These give you a baseline to test against.
Screens placed in reception and high-traffic areas are also effective revenue drivers when used to promote personal training, retail, and membership upgrades. The key is scheduling content so the right message appears at the right moment rather than running a single loop all day.
For installation and content management options, Pikpikpow’s digital signage solutions cover both hardware and ongoing content support.

What do UK managers need to know about safety signage compliance?
Safety signage in UK gyms is governed by the Health and Safety (Safety Signs and Signals) Regulations 1996. The core principle is straightforward: you must provide safety signs where a significant risk remains after all other controls (engineering, administrative, procedural) have been applied. Signs are a secondary control, not a substitute for removing the hazard.
HSE guidance L64 adds an important caution: over-signage is as problematic as under-signage. Too many signs in one area create visual clutter and dilute the impact of genuinely important warnings. Every sign you put up should be there because a risk assessment justifies it.
| Compliance requirement | What it means in practice |
|---|---|
| Risk-assessment basis | Only install safety signs where a residual risk remains after other controls |
| Sign standards | Follow BS 5499 series for size, colour, symbols and illumination |
| Illumination | Signs in low-light areas (corridors, changing rooms) must be adequately lit or self-luminous |
| Maintenance | Signs must remain legible, clean, undamaged and securely fixed at all times |
| Staff training | Employees must be informed of what each sign means and what action to take |
| Inspection intervals | Regular checks; a monthly visual inspection is a reasonable minimum for a busy gym |
A practical maintenance schedule for a gym might look like this: a monthly visual check of all safety signs for legibility and secure fixing; a quarterly review of whether signs still reflect current risk assessments; an annual full audit against the Regulations and BS 5499 standards. Any sign that is faded, damaged, or obscured must be replaced promptly.
For broader compliance context across high-traffic facilities, the construction signage compliance guide covers overlapping regulatory principles.
This article provides general information about UK signage regulations. Confirm the current requirements with the HSE or a qualified health and safety professional for your specific facility.
How do you measure whether onboarding signage is working?
You do not need a complex analytics platform to test signage impact. A few simple metrics, tracked consistently, will tell you whether your signs are doing their job.
Check-in time. Measure the average time from a new member entering the building to completing check-in. If reception signage is clear, this should fall within the first month of installation.
Front-desk query rate. Count the number of directional or procedural questions staff receive per session. A reduction after new wayfinding signs are installed is a direct signal of effectiveness.
Induction duration. If instructional signs on the gym floor are working, induction sessions should shorten because members arrive already oriented to zones and basic equipment.
QR-scan rates. Track scans from QR codes on reception screens, equipment instruction signs, and promotional panels. Low scan rates on a high-traffic sign suggest the call to action needs revision.
Class no-shows and late arrivals. Studio timetable signs and pre-class instruction screens should reduce both. Track these weekly for the first 90 days after installation.
Promo uptake. If a changing-room screen promotes a PT session or class pack, track redemptions against the period the promotion runs. This gives you a direct revenue signal from digital signage.
For a simple A/B test: run two different welcome-screen messages at reception across alternate weeks and compare QR-scan rates. Or test a printed poster against a digital screen for the same promotion and compare uptake. Neither test requires specialist software, just consistent tracking.
A weekly quick-check dashboard covering query rate, QR scans, and class no-shows gives you enough data to make decisions at the 30-day mark. A fuller review at 90 days, comparing pre- and post-installation baselines, gives you the evidence to justify further investment.
Your implementation checklist and supplier brief
Getting signage produced and installed efficiently comes down to a clear brief. Here is a step-by-step process you can follow and hand to a signage partner.
Project steps:
- Audit your current signage. Walk the member journey from entrance to exit and note every decision point that lacks a sign, every sign that is damaged or illegible, and every area where members regularly ask for directions.
- Define zones and content. List every zone (entrance, reception, gym floor, studios, changing rooms, exit) and the sign types needed in each. Note whether each sign is mandatory (safety) or best practice (wayfinding, instructional, motivational).
- Prepare a content brief. For each sign, specify the primary message, supporting copy, any QR codes or URLs, and the tone (welcoming, instructional, regulatory).
- Select materials and finishes. Specify substrate requirements: moisture-resistant for changing rooms, wipe-clean for equipment areas, anti-glare for screens under gym lighting.
- Agree accessibility requirements. Note where pictograms, plain English, or high-contrast finishes are needed.
- Commission design and production. Share the brief with your signage partner, including site dimensions, viewing distances, and brand guidelines.
- Plan installation. Agree fixing methods (wall-mounted, freestanding, suspended), cable routing for digital screens, and a timeline that minimises disruption to members.
- Post-install inspection. Walk the member journey again on day one after installation. Check legibility, positioning, and secure fixing before the facility opens.
One-page supplier brief template:
- Site context: gym name, location, number of floors, approximate member footfall per day
- Zones: list of areas requiring signage with dimensions and viewing distances
- Sign types required: wayfinding, safety, instructional, motivational, digital
- Materials: substrate preferences, finish (matt, gloss, anti-bacterial), durability requirements
- Accessibility notes: contrast ratios, pictogram requirements, plain English standard
- Brand guidelines: colours, typefaces, logo files
- Maintenance expectations: cleaning method, inspection schedule, replacement process
- Timetable: design approval deadline, production lead time, installation date
Budgeting and lead times. For a mid-sized gym, allow four to six weeks from brief to installation for a full printed signage package. Digital screen installations typically require additional lead time for hardware procurement and content setup. Get quotes that include design, production, installation, and a post-install review as separate line items so you can compare like for like.
For a ready-to-use audit framework, the indoor signage checklist covers visibility and compliance in one document.
Key takeaways
Signage is the most cost-effective tool in the gym onboarding process: it guides members, reduces staff load, meets legal obligations, and builds brand trust from the first visit.
| Point | Details |
|---|---|
| Audit first | Walk the full member journey and identify every decision point that lacks a sign before commissioning anything. |
| Prioritise wayfinding and safety | Wayfinding and mandatory safety signs deliver the highest immediate impact on member confidence and legal compliance. |
| Add digital reception content | A reception screen showing a welcome message, class timetable, and QR-linked induction reduces queries and speeds check-in. |
| Schedule a maintenance routine | Monthly visual checks and a quarterly risk-assessment review keep signs compliant under the Health and Safety (Safety Signs and Signals) Regulations 1996. |
| Pikpikpow for end-to-end delivery | Pikpikpow handles audit, design, manufacture, and installation of bespoke gym signage across the UK, including digital screen solutions. |
What gym managers often get wrong about onboarding signage
The most common mistake is treating signage as decoration rather than infrastructure. A gym that spends significant budget on equipment and fit-out, then orders a handful of generic printed signs at the last minute, is leaving a real gap in the member experience. New members do not know your layout, your etiquette expectations, or your safety procedures. Signs are the system that communicates all of that without requiring staff to repeat themselves dozens of times a day.
The second mistake is over-signing. HSE guidance is explicit on this point: too many signs in one area reduce the effectiveness of each individual sign. If every wall carries a message, members stop reading any of them. The discipline is to sign decision points, not surfaces.
There is also a tendency to underestimate the role of tone. A gym whose safety and etiquette signs read like legal warnings creates a different atmosphere from one whose signs use welcoming, positive language. Both can carry the same information. The version that feels like a welcome rather than a rulebook will always perform better for retention.
Digital signage is where the biggest opportunity currently sits for most UK gyms. The ability to schedule content by time of day, update promotions instantly, and deliver a personalised welcome message at reception is genuinely useful for onboarding. Yet many gyms either do not have screens or run a single static loop that never changes. Getting the content cadence right, as covered earlier in this article, is what separates a screen that members notice from one they ignore.
Pikpikpow designs and installs gym signage from brief to fitting
Gym managers who want signage that actually works during onboarding need more than a print supplier. They need a partner who understands the member journey, knows which materials hold up in high-humidity changing rooms, and can deliver digital screen installations alongside printed wayfinding in a single project.

Pikpikpow is a UK-based design, signage, and print company that handles the full process: site audit, content brief, design, manufacture, and installation. Whether you need a complete onboarding signage package for a new facility or a targeted upgrade to reception and gym-floor signs, the team works to your timeline and brand guidelines. Digital signage solutions are available alongside printed and architectural options, so you can brief one supplier for the whole project.
To get started, request a free site survey or use the signage systems page to explore modular options for multi-zone gyms. A member of the team will come to your facility, walk the member journey with you, and produce a costed brief you can act on.
Useful sources for further reading
- Health and Safety (Safety Signs and Signals) Regulations 1996 — the primary legislation governing when safety signs are required in UK workplaces
- HSE Safety Signs and Signals — L64 guidance — the official HSE guidance document covering sign standards, maintenance obligations, and the BS 5499 series
- HSE safety signs overview — a practical summary of employer obligations for safety signage
- Pikpikpow: what makes effective gym signage — applied design and material guidance for gym environments
- Pikpikpow: sports facility signage best practices — a manager-facing guide covering placement, checklists, and measuring impact