
TL;DR:
- Managing bespoke signage projects requires thorough documentation, clear ownership, and precise file preparation to prevent delays and rework. Proper planning at each stage—from permits and technical files to manufacturing and installation—ensures smooth workflows and consistent quality. Limiting proof rounds and utilizing centralized platforms help maintain timelines, control costs, and uphold brand standards across multiple locations.
Getting bespoke signage from brief to installation without delays, rework, or budget overruns is harder than it looks. The workflow for bespoke signage involves multiple disciplines — design, materials, manufacturing, electrical, and installation — and a gap at any one stage ripples through everything that follows. Project managers who treat signage as a simple procurement task routinely run into file rejections, permit hold-ups, and last-minute installation surprises. This guide walks you through each production stage in plain terms, so you can manage your next signage project with confidence and keep every stakeholder on the same page.
Table of Contents
- Key takeaways
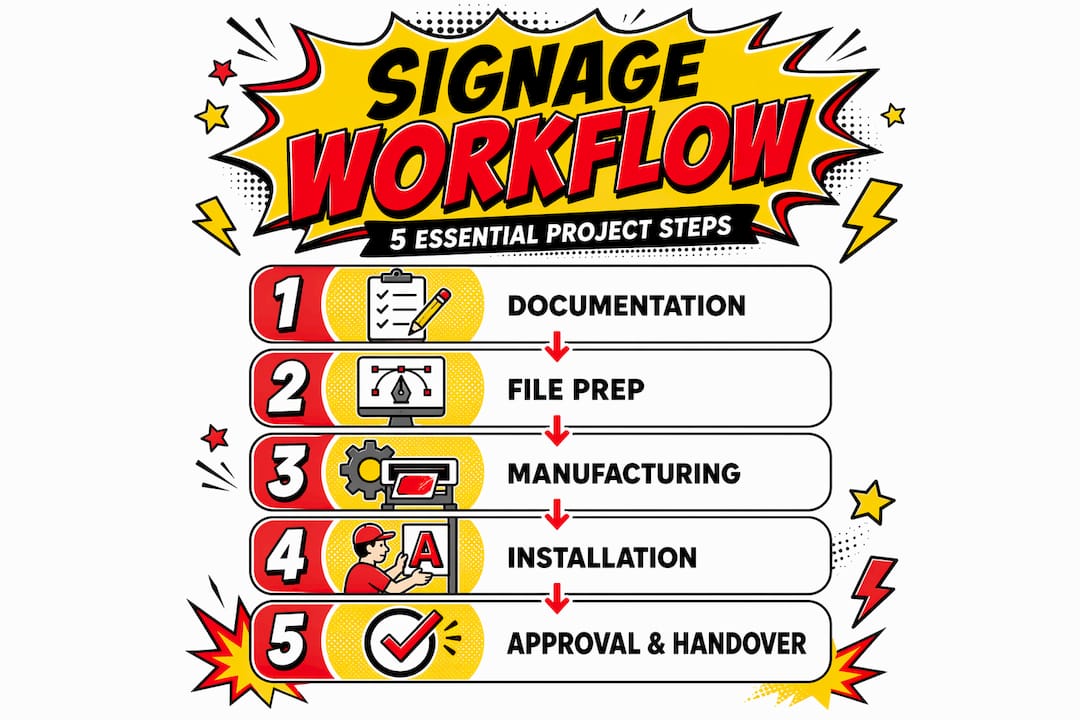
- Prerequisites and documentation for bespoke signage
- From artwork to production-ready files
- Manufacturing stages: routing, printing, and quality control
- Installation: preparation and on-site procedures
- Proofing, approvals, and project closure
- Our perspective on bespoke signage workflows
- Work with Pikpikpow on your next signage project
- FAQ
Key takeaways
| Point | Details |
|---|---|
| Documentation prevents delays | Gather all permits, drawings, and consent letters before production begins to avoid costly hold-ups. |
| File prep is the highest-risk stage | Incorrect artwork formats and missing bleed cause the majority of production delays and rework costs. |
| QC must happen at every stage | Quality checks at file review, mid-production, and final inspection catch errors before they become expensive. |
| Proof rounds should be limited | Capping approval rounds at two or three protects project timelines and shifts liability clearly to the client. |
| Clear ownership speeds up delivery | Assigning one person per signage element eliminates confusion and keeps updates moving without committee sign-off. |
Prerequisites and documentation for bespoke signage
Before any design work begins, your paperwork needs to be in order. This is the stage most project managers underestimate, and it is where projects most commonly stall before they have even started.
Sign permit applications require a site plan, elevation drawings, a sign detail drawing, an electrical wiring diagram, attachment details, and an owner consent letter as mandatory documents. Missing even one of these triggers a council or planning authority rejection, which can add weeks to your timeline. If your signage involves illumination, factor in electrical documentation from the outset.
A clear Statement of Work is equally non-negotiable. A structured SOW with defined scope, exclusions, and deliverables reduces scope creep by up to 80%. That figure matters in bespoke signage, where client-requested changes mid-production can mean scrapping cut materials or reprinting large-format graphics entirely.
Centralise your project documentation from day one. Use a single platform where briefs, design files, approvals, and revision history all live together. A centralised signage platform acts as a single source of truth for multi-location projects, aligning internal teams and suppliers to the same brand standards without extra headcount.
The table below outlines the core documents and tools you need before production begins.
| Document or tool | Purpose | When to obtain |
|---|---|---|
| Site plan and elevation drawings | Required for planning permission and structural positioning | Before brief is issued |
| Electrical wiring diagram | Needed for illuminated signage permits | At brief stage |
| Owner consent letter | Planning authority requirement | Before permit application |
| Statement of Work | Defines scope, exclusions, and sign-off points | Before any design begins |
| Project management platform | Centralises files, approvals, and revisions | At project kick-off |
| Material specifications sheet | Confirms substrate, fixings, and finish requirements | Before supplier briefing |
Pro Tip: Specify signage requirements early in any building or fit-out project. Early signage specification prevents costly structural changes and gives your manufacturing partner sufficient lead time for complex fabrication.
From artwork to production-ready files
File preparation is consistently the most common cause of project delays in the signmaking process. Getting this stage right protects your timeline and avoids expensive rework.
The custom signage process depends entirely on receiving artwork that your manufacturer can actually use. Customer-supplied files are frequently unsuitable for production. They arrive as low-resolution JPEGs, in RGB colour mode, with fonts that are not outlined, and without any bleed or crop marks. Each of these issues requires correction before production can start, and in a busy workshop, that correction takes time you may not have budgeted for.
Here is a practical checklist for production-ready design files:
- Resolution: Minimum 300 dpi for print-based signage; vector formats (AI, EPS, SVG) preferred for routing and cutting
- Colour mode: Convert all files to CMYK for print; confirm Pantone references for colour-matched substrates
- Fonts: Outline all fonts or supply the original font files to prevent substitution errors
- Bleed and crop marks: Add a minimum 3mm bleed on all print files, with crop marks set at standard offsets
- Layers: Flatten layers or clearly label them if passing files to a CNC routing workflow
- File format by process: PDF/X-4 for print, DXF or DWG for routing, AI for vinyl cutting
Pro Tip: Request your signage provider’s file specification template before any design work begins. Provider-specific templates prevent production file issues and eliminate the rework delays that most commonly derail project timelines.
Material selection also needs to happen at this stage, not later. Confirm substrate, thickness, surface finish, and fixing method before files go to the workshop. Changes to material specification after file preparation can mean redoing artwork at a different size or proportion.
A common pitfall is treating the design sign-off and the production file as the same thing. Your client approves a visual; your manufacturer needs a technical file. These are different documents, and the workflow for corporate signage that runs smoothest keeps them clearly separated.
Manufacturing stages: routing, printing, and quality control
Once files are production-ready, the signmaking process moves into three overlapping manufacturing stages: fabrication, print, and assembly.
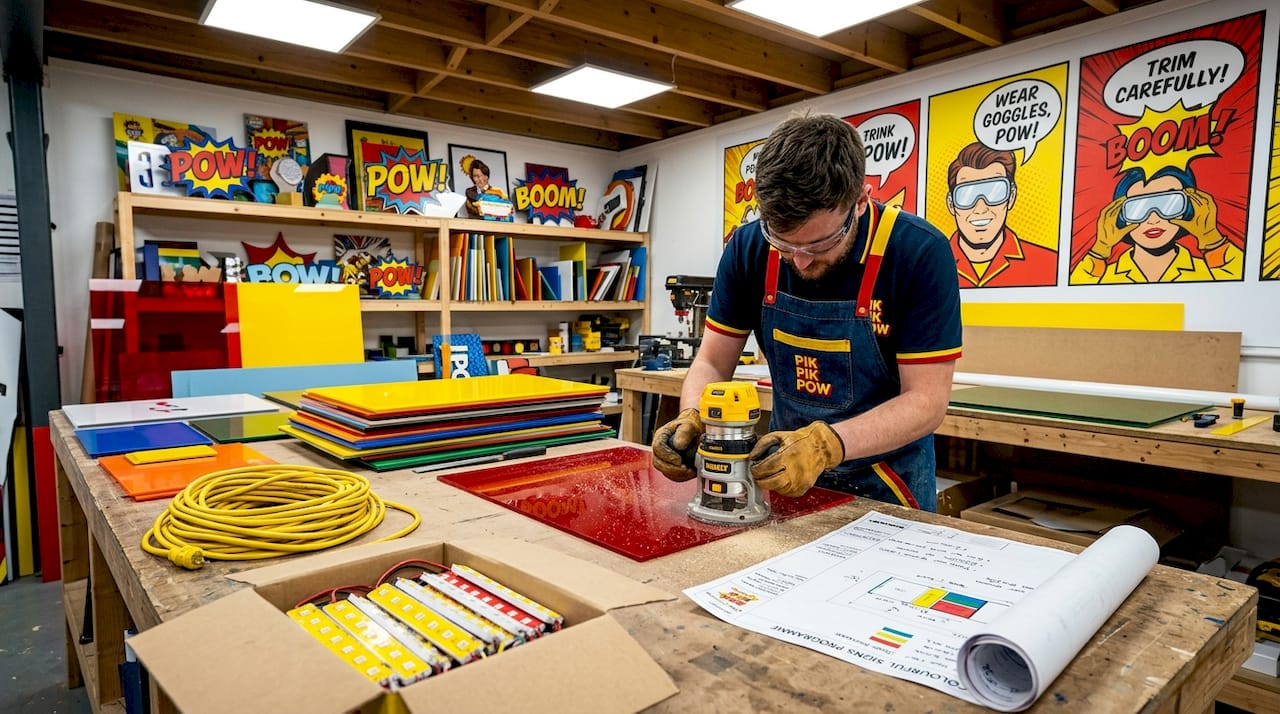
Routing and cutting happens first for three-dimensional signs. CNC routers cut acrylic, foam PVC, aluminium composite, and other substrates to precise dimensions. The operator checks the DXF file against the job sheet before cutting begins. This pre-production check is critical. Quality control at multiple points from file review through to final inspection reduces errors and maintains consistency across a batch of signs.
Printing and finishing run in parallel or immediately after cutting. Wide-format digital printing applies graphics to substrates or media, while vinyl plotting cuts lettering and logos for application. After printing, finishing steps include lamination, mounting, and trimming.
Assembly and integration follow. Illuminated channel letters, for example, require LED modules to be fitted inside fabricated letterforms, with a power supply and driver sized to the length of LED run. This is where electrical components are integrated, and where a mistake in the original wiring diagram compounds into a physical problem on the bench.
The table below compares quality gates across manufacturing approaches.
| Stage | Manual check | Automated or tool-based check | Common failure caught |
|---|---|---|---|
| Pre-production file review | Job sheet vs. file dimensions | Preflight software (e.g. Acrobat preflight) | Incorrect size, wrong colour mode |
| CNC routing | Test cut on offcut material | Machine calibration log | Dimensional error, wrong material thickness |
| Print output | Colour proof vs. Pantone swatch | Spectrophotometer reading | Colour drift, banding |
| Assembly | Visual check of LED polarity | Lux meter reading | Uneven illumination, dead LEDs |
| Final inspection | Full sign against brief | Photographic record | Finish defects, missing elements |
Do not skip the final photographic record. It documents the condition of the sign before it leaves the workshop and protects your business if a dispute arises after installation.
Installation: preparation and on-site procedures
A well-manufactured sign can still cause a project to fail if installation day is not properly prepared. Site readiness and electrical arrangements are the two most frequent causes of delays.
Follow these steps to prepare for a smooth installation:
- Confirm structural fixing points. Before installation day, verify that the wall, fascia, or substrate can accept the sign’s weight and fixing method. Request a structural survey if you are mounting anything heavy on a facade.
- Arrange electrical supply in advance. A dedicated 20-amp circuit is typically required for illuminated channel letter installations. A licensed electrician must run power to the location before the sign installation crew arrives. Lack of power on the day is one of the most common causes of aborted installations.
- Clear site access. Confirm access routes, scaffold or cherry-picker requirements, and any permits needed for working at height. Notify building management and, where relevant, neighbouring occupiers.
- Check weather conditions. Wet or high-wind conditions affect adhesive-bonded fixings and make working at height hazardous. Build weather contingency days into your programme.
- Assign a site supervisor. One person on site should have authority to approve minor deviations from the installation drawing. Decision-making delays on site cost money in crew time.
For detailed practical guidance on managing the full installation process, the signage installation guide from Pikpikpow covers site preparation and on-site procedures in full.
After installation, conduct a final on-site check. Test all illuminated elements, confirm fixings are secure, and clean the sign surface before photographing the completed installation.
Proofing, approvals, and project closure
Proofing is where many bespoke signage projects lose time unnecessarily. A structured approval workflow protects your timeline and creates a clear legal record.
Plan for a maximum of two structured proof rounds. Limiting proof rounds to two or three prevents scope creep and maintains project profitability. More than three rounds is almost always a sign that the original brief was unclear, not that the design is wrong.
Here is what a disciplined proofing process looks like in practice:
- Round one: Client reviews the design proof against the original brief. All feedback is consolidated into a single, annotated document. Do not accept verbal feedback at this stage.
- Round two: Revised proof is issued with a point-by-point response to each annotation. Client confirms whether comments have been addressed or flags any outstanding issues.
- Final sign-off: Client signs or countersigns a final approval document. This final sign-off legally transfers responsibility for errors to the client. Anything approved at this stage cannot be reprinted at the manufacturer’s cost.
Digital proofing tools help here. PDF annotation platforms allow clients to mark up proofs directly, which reduces the back-and-forth of email descriptions and lowers the risk of misinterpretation.
Your audit trail at project closure should include the final approved proof, the sign-off document, photographic evidence of the completed installation, and any permit certificates. Keep these on file for a minimum of three years.
Pro Tip: Use a branded signage workflow guide as a reference document when briefing new clients. Sharing your process upfront sets clear expectations and significantly reduces revision requests.
Our perspective on bespoke signage workflows
In my experience working across retail fit-outs, construction hoardings, and commercial interiors, the single biggest source of project failure is not bad design or poor manufacturing. It is unclear ownership.
When no one person is accountable for a specific signage element, decisions go to committee. Committees are slow. They produce contradictory feedback. They generate revision rounds that eat into margins and delay production. I have seen well-designed, accurately manufactured signs sit in a workshop for two weeks waiting for a client to consolidate four people’s feedback into one document.
Assigning clear ownership to individuals per signage component significantly improves workflow efficiency and update speed. This applies at the client side as much as the production side. One named contact who has authority to approve proofs is worth more to a project than five stakeholders who all have opinions.
The other lesson I keep returning to is that proof rounds are a symptom, not a problem. If you are regularly hitting round four or five on a bespoke project, the issue is almost always in the brief, not the design. Spending an extra hour at the briefing stage, asking more specific questions about brand guidelines, colour tolerances, and installation context, typically removes two full revision cycles.
Finally, for anyone managing signage across multiple locations, a multi-location signage platform is not a luxury. It is the only way to maintain brand consistency without micromanaging every site individually.
— PikPikPOW!
Work with Pikpikpow on your next signage project

Pikpikpow works with businesses across retail, construction, commercial interiors, and the TV and film industry to deliver bespoke signage from concept through to installation. Whether you need architectural shopfront signage, wide-format print, or a full interior wayfinding system, the team combines design expertise with precision manufacturing to deliver on time and on brief.
Explore Pikpikpow’s bespoke signage systems to see the full range of fabrication and finishing options available for your project. If your business requires dynamic messaging or screen-based display, the digital signage solutions page outlines how Pikpikpow approaches content-driven signage for modern commercial environments. Get in touch to discuss your project requirements and receive a clear, documented quote with no ambiguity about scope.
FAQ
What documents are needed before starting a bespoke signage project?
You will need a site plan, elevation drawings, an electrical wiring diagram for illuminated signs, attachment details, and an owner consent letter before applying for planning permission. A signed Statement of Work should also be in place before design begins.
How many proof rounds should a bespoke signage project include?
Two to three structured proof rounds is the recommended maximum. More than three rounds typically signals an unclear brief and risks scope creep, which affects both timelines and project costs.
What file formats are needed for signage production?
Use PDF/X-4 for print files, DXF or DWG for CNC routing, and AI or SVG for vinyl cutting. All files should be in CMYK colour mode, with fonts outlined and a minimum 3mm bleed on print artwork.
Why does illuminated signage require a licensed electrician on installation day?
Illuminated channel letters typically require a dedicated 20-amp electrical circuit. A licensed electrician must install and test the power supply before the sign installation crew can complete the fitting. Arriving on site without power in place is one of the most common causes of installation delays.
How does a centralised workflow platform help with multi-location signage?
A centralised platform maintains a single version of approved files, brand standards, and project status across all locations. This prevents inconsistencies between sites and removes the need for manual coordination with each individual location or supplier.